


In BULBTEK, we are committed to delivering automotive lighting products that combine reliability, consistency and top-tier performance. One of the key tools we use in this process, is the integrating sphere, which allows us to measure light output with precision and accuracy.
Step 1: Preparation
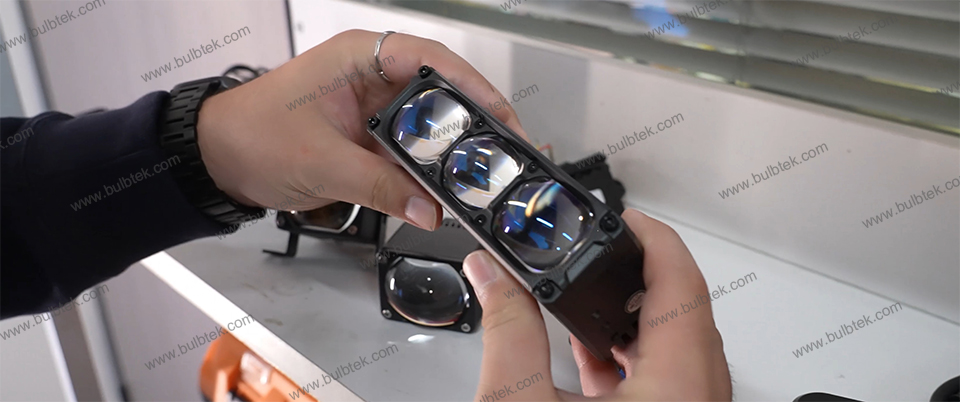
Before testing begins, each LED spotlight is carefully inspected to ensure there are no visible defects. Our integrating sphere is 1.5 meter diameter, designed to provide highly maximum and accurate measurements that cover the full range of our current and future automotive lighting products. The power source is set at a standardized 13.2 volts, ensuring all tests are conducted under consistent conditions.
Generally speaking, integrating spheres have three common sizes, 0.5 m, 1 m and 1.5 m in diameter. The 0.5 m integrating sphere can usually only be used to test small lights, such as turning signals; the 1 m diameter integrating sphere can be used to test larger lights, such as some headlights and small lenses, etc.; and the 1.5 m diameter integrating sphere can test the vast majority of car LED currently on the market (including bar lights and work lights), and the test results will be more accurate.
There is also a smaller test box that many people use at stalls or exhibitions. Although this test box is easy to carry, the data it measures is usually greater than the actual data, so it cannot be used to accurately measure the data of car lights. It can only be used to compare the actual performance values of two different car lights.
The reason why we use the external power supply for testing instead of the default power supply which is included in the integrating sphere system: because the default power supply which is included in system has a long and thin output wire cable to the tested products, which increases the power consumption (estimated 5% to 10%), results into a higher power/watt output figure, this situation is always ignored by most of suppliers or sellers, let alone the terminal drivers too.
Step 2: Instant Performance Testing
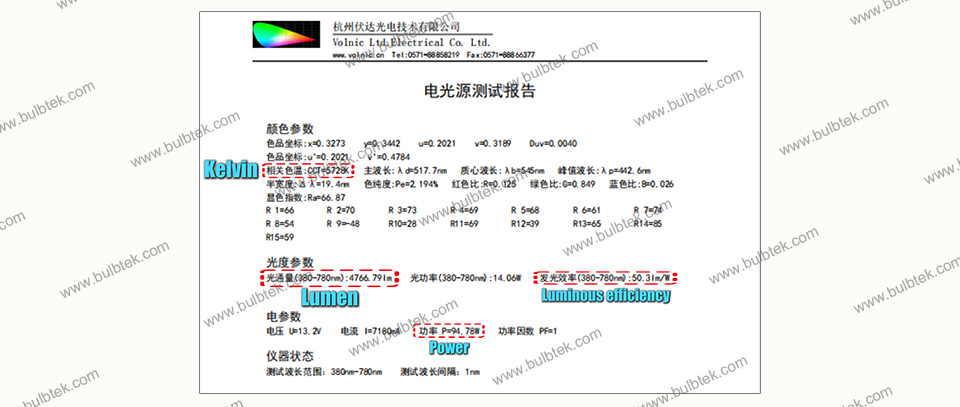
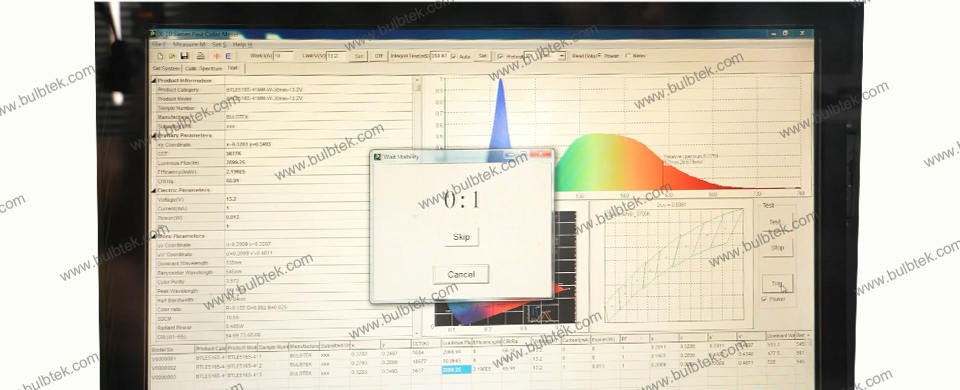
We connect the product to the power supply and record the initial current, power, lumen and color temperature, light efficiency, etc. immediately after the light is turned on. For multi-color products, such as those with yellow and white options, we measure each mode individually. These readings provide valuable insights into the light’s performance at startup.
Step 3: Continuous Operation Testing
Next, the light runs continuously for 30 minutes. During this time, the current stabilizes—typically within 5 to 15 minutes. After 30 minutes of operation, we record another full set of measurements, including current, power, lumen, and color temperature for every color mode. This step ensures that the lamp maintains stable and reliable performance over time.
Step 4: Data Verification and Reporting
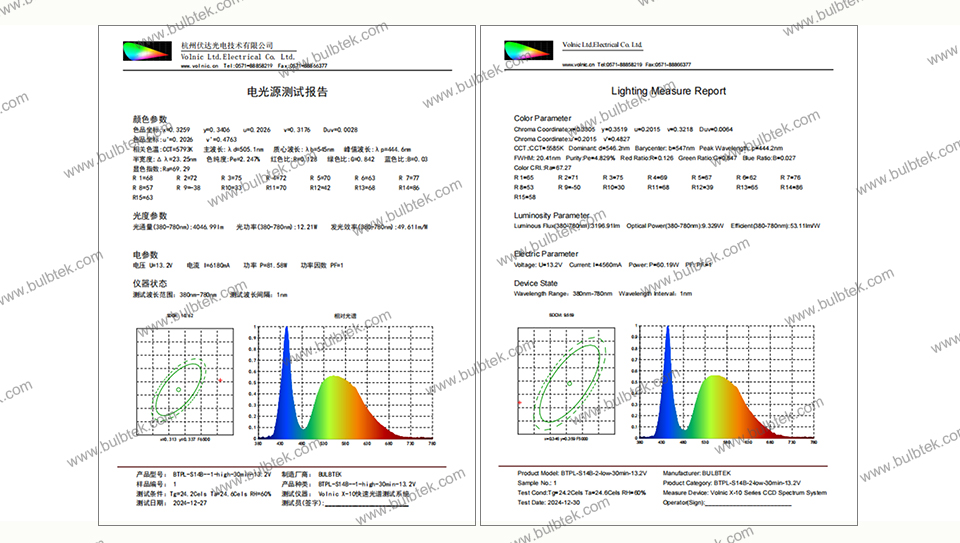
For accuracy, we usually test two bulbs of the same model and compare the results. Once the data is confirmed to be within a reasonable range, it is compiled into a detailed report. Both Chinese and English PDF versions are generated for internal use and customer reference.
Our Commitment
By applying this rigorous testing process, the integrating sphere allows us to capture precise, trustworthy data—reinforcing our commitment to high standards and long-term partnerships with our customers.
Thanks for reading, if you have any question about car LED headlight bulb, LED spot auxiliary lights, car LED projector lens and LED signal lights, please feel free to contact us.
BULBTEK website: https://www.bulbtek.com
More videos and pictures on our Facebook, Instagram, Twitter, YouTube and TIKTOK.
Facebook: https://www.facebook.com/bulbtek
Instagram: https://www.instagram.com/bulbtek_LED
Twitter: https://twitter.com/BULBTEK_LED
YouTube: https://www.youtube.com/@bulbtekLED
TikTok: https://www.tiktok.com/@bulbtek
Post time: Oct-21-2025